Scope
Steps to create a Saved Group without selecting the individual contacts each time.
Instructions – via New Group
-
Go to Advanced Messaging.
-
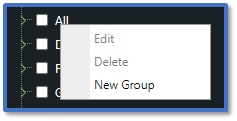
Right-click on a group in the Search tab and select New Group.
-
In the Add Edit Group window, enter the name of the group.
-
Click Submit.
-
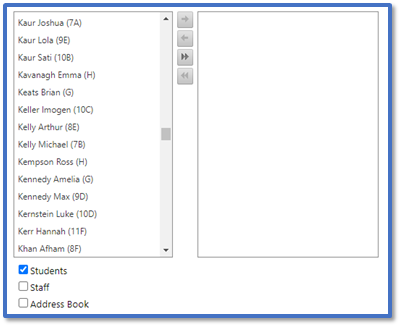
In Edit Group, select the contact you want and drag them to the group list on the right. To select multiple contacts, hold Shift and select each contact then drag them.
-
Once finished, click Submit.
-
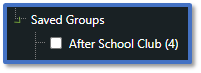
In the Search tab, expand the Saved Groups section to see your new group listed.
-
Tick the group to add them as recipients for your messages. Read our guides for further information: Messenger: Manage Saved Groups / Messenger: Send Advanced Messages.
Instructions – via Save Group
-
Go to Advanced Messaging.
-
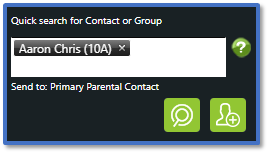
Use Quick search for Contact or Group to find the contacts you want to include in a Saved Group > Add to Recipient.
-
Once you have added all the relevant contacts, click Save Group.

-
Type in the Group Name and confirm the correct contacts are listed.
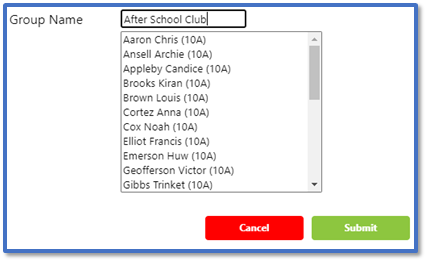
-
Click Submit.
-
In the Search tab, expand the Saved Groups section to see your new group listed.
-
For future messages, tick this group to add them as recipients.
-
Read our guides for further information: Messenger: Manage Saved Groups / Messenger: Send Advanced Messages.