Scope
Steps to check an individual’s contact information from Advanced Messaging.
Instructions
-
In Advanced Messaging, your contacts are added to the list of recipients. Read our guide for further information: Messenger: Send Advanced Messages.

-
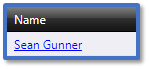
Click on the name of the contact to open their Contact Details.
-
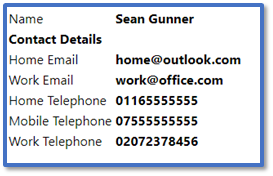
Their contact will show their name and contact information:
-
-
Home Email: The contact’s personal email address used for Email.
-
Work Email: The contact’s business email address used for Email.
-
Home Telephone: The contact’s landline number used for Voice to Home.
-
Mobile Telephone: The contact’s personal mobile number used to SMS to Mobile and Voice to Mobile.
-
Work Telephone: The contact’s work number used for Voice for Work.
-
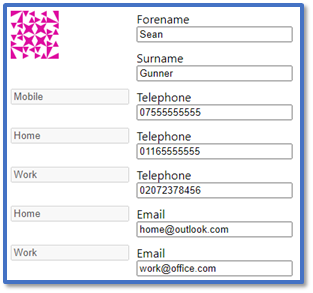
Click Edit to manually make changes to these contact details. Read our guide for further information: Messenger: Manage Contacts.

-
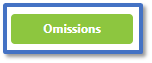
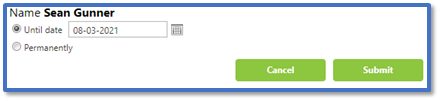
Click Omissions to prevent the contact from receiving message temporarily or permanently. Read our guide for further information: Messenger: Manage Omissions.
-
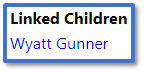
Their contact page will show their Linked Children i.e., the students that they have a relationship with such as Mother or Father.
-
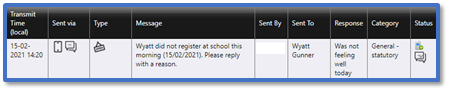
It also shows the Communication History specific for this contact including:
-
-
Transmit Time: The date and time the message was sent.
-
Sent via: Whether the message was sent by SMS, email, Xpression etc.
-
Type: Whether it was Broadcast, Open, or Closed. Read our guide for further information: Messenger: Broadcast, Open, and Closed SMS.
-
Message: The contents of the message.
-
Sent By: Which user it was sent from.
-
Sent To: Which contact it was regarding.
-
Response: If the contact replied to the message, the contents of the reply.
-
Category: The message category.
-
Status: The delivery status of the message. Read our guides for further information:
-
The Communication History only shows a limited amount of information by default. Click Load All Data to show their entire history.

-
Click Export Communication History to download a spreadsheet with their message history.